

How To Install Mysql Server In Kali Linux
Installing and configuring MySQL and phpMyAdmin on Kali Linux
Table of contents
i. What is MySQL for
two. MySQL client and server
iii. Installing MySQL on Kali Linux
iv. Kali Linux replaced MySQL with MariaDB
v. Setting up MySQL on Kali Linux
6. Starting and enabling MySQL autorun
seven. Setting and changing the MySQL password. Reset forgotten MySQL/MariaDB countersign
8. How to connect to MySQL server
9. How to alter MySQL user password in Kali Linux
ten. No countersign and empty MySQL password
11. How to install phpMyAdmin on Kali Linux
12. How to alter phpMyAdmin URL
xiii. Error "Login without a password is forbidden by configuration (run across AllowNoPassword)"
14. How to use phpMyAdmin on Kali Linux
15. phpMyAdmin alternative
xvi. Boosted MySQL Resources
What is MySQL for
MySQL is a database direction arrangement that allows you to create, store, modify databases. It is oftentimes used in conjunction with PHP to store website databases. It tin can also exist used as a information store for whatever program or tool.
phpMyAdmin is a web application written in PHP that is a graphical interface for MySQL that allows you lot to work with information, including viewing, modifying, importing and exporting data in a spider web interface. phpMyAdmin requires a web server (Apache), likewise as PHP and MySQL.
This tutorial will help you better sympathize MySQL and use it to work with databases. Nosotros will also install and configure phpMyAdmin to go a graphical database management interface. Using this knowledge, you lot can, for instance, run a site on a local estimator, deploy a site using a database from a backup.
MySQL client and server
MySQL has two principal components: server and customer.
The MySQL server is the DBMS that powers the databases. The server is required for the database to piece of work.
MySQL client is a utility for connecting to a server. The client is needed if you lot desire to connect to the MySQL server on the control line.
Installing MySQL on Kali Linux
If you take already worked with Debian derivatives (Linux Mint, Ubuntu), so at that place are two packages in them:
- mysql-server - MySQL server
- mysql-customer - MySQL client
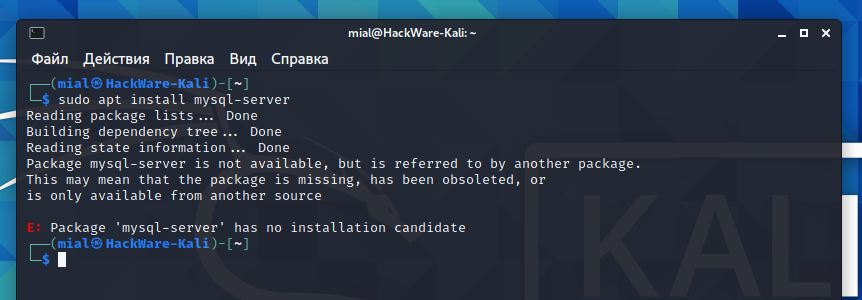
By default, MySQL is already preinstalled in Kali Linux, but if you have a minimal build, and then you may demand to install the DBMS manually. If you try to install the mysql-server package, you will receive the following error:
Package mysql-server is non bachelor, just is referred to past some other parcel. This may hateful that the packet is missing, has been obsoleted, or is only available from another source E: Package 'mysql-server' has no installation candidate
The fact is that in Kali Linux (and apparently in fresh Debian, likewise equally in all its derivatives), this bundle is called differently:
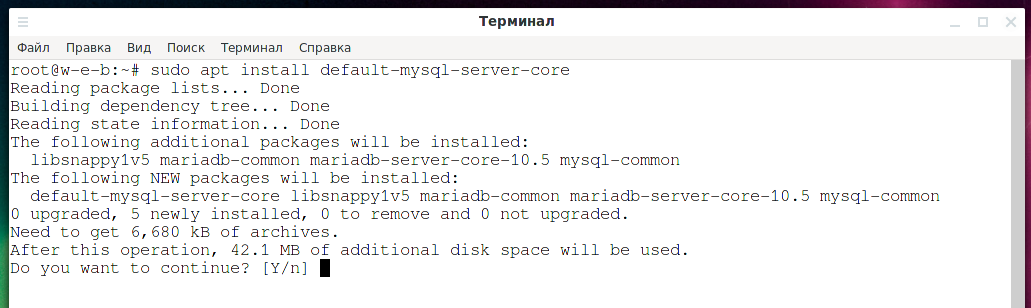
- default-mysql-server (DBMS executables and system database setup)
- default-mysql-server-core (only DBMS executables)
Therefore, use the following command to install MySQL:
sudo apt install default-mysql-server
Kali Linux replaced MySQL with MariaDB
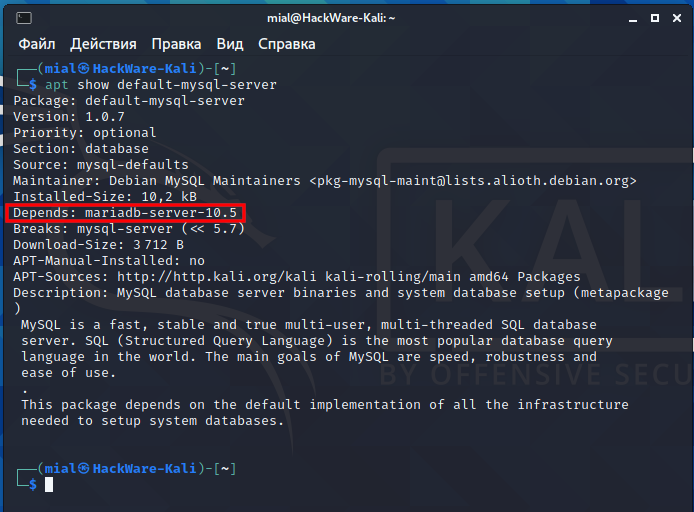
We say MySQL, but MySQL is completely absent-minded from the Kali Linux repositories. Regardless of whether this DBMS was preinstalled on your system or y'all installed it manually, MariaDB is installed instead.
Y'all tin verify this yourself with the command:
apt show default-mysql-server
Again, MySQL is absent in the Kali Linux repositories, and if you need exactly MySQL, and non MariaDB, and then y'all will have to decide this either by connecting an additional repository, or by manually installing the downloaded file.
MariaDB is besides a database management organization. It is forked from MySQL. MariaDB's chore is to perform all the functions of MySQL, only to be improve. The service proper name, the name of the configuration files have not changed. Just out of addiction, I will continue to say "MySQL" in this tutorial, simply we will piece of work exclusively with MariaDB.
Setting up MySQL on Kali Linux
MySQL config files:
- /etc/mysql/my.cnf (link to /etc/alternatives/my.cnf)
- /etc/mysql/debian.cnf (obsolete file will be removed in time to come versions)
- /etc/mysql/conf.d/mysql.cnf
- /etc/mysql/conf.d/mysqldump.cnf
- /etc/mysql/mariadb.conf.d/fifty-client.cnf
- /etc/mysql/mariadb.conf.d/50-mysqld_safe.cnf
- /etc/mysql/mariadb.conf.d/lx-galera.cnf
- /etc/mysql/mariadb.conf.d/50-mysql-clients.cnf
- /etc/mysql/mariadb.conf.d/50-server.cnf
Nearly of the settings are collected in the 50-server.cnf file. Past default, the MySQL service listens for incoming connections only on localhost (connections from other computers are not possible).
Starting and enabling MySQL autorun
To start the service, run the command:
sudo systemctl start mysql
By default, all network services are disabled from autostart, see the article "Configuring and starting network services on Kali Linux (Apache, MySQL, SSH, PostgreSQL, NetworkManager and Bluetooth)" for details.
To enable MySQL autorun every time you plough on your calculator, run the control:
sudo systemctl enable mysql
Setting and irresolute the MySQL password. Reset forgotten MySQL/MariaDB countersign
For a newly installed MySQL, the root countersign is empty. To change it, run and follow the instructions:
sudo mysql_secure_installation
For a detailed description of the steps and translation of instructions, see the article "What is the MySQL root countersign in Kali Linux. How to change/reset MySQL root password in Kali Linux". In the same commodity, see how to reset your password if you've forgotten it.
How to connect to MySQL server
When the MySQL server service is running, you need to use a command like this to connect to it:
mysql -u USER -p -h HOST
All three arguments are optional.
If the -u selection is omitted, the current Bone username volition be used as the MySQL username.
The -p option means that y'all are logged in with a countersign. Later on this option, you do not demand to write a password - it will exist requested at the command line prompt.
If you do not specify the -h choice, then an endeavor will be made to connect to the local server.
Attempting to connect when no user countersign is set:
mysql -u root
This will throw an error:
Error 1698 (28000): Access denied for user 'root'@'localhost'
The essence of the problem is that unix_socket hallmark is used by default, that is, when the OS username coincides with the username in MySQL/MariaDB, then the password does not need to be entered at all. But other users cannot log in as another user, so you need to use sudo to log in as root. Run across the article "Password and unix_socket authentication in MySQL and MariaDB" for details.
You can choose i of the options:
one. Ever use sudo:
mysql -u root
2. Make changes to the MySQL settings and then that ordinary users can connect to the DBMS.
iii. Create a new MySQL user. If this is a user with the same proper noun as your proper noun in the Bone, then you tin can use unix_socket authentication and not enter a password when connecting. Alternatively, you lot tin choose password hallmark and use any name.
To admission the MariaDB database as a regular user without using sudo privileges (this will also set up the root user password), become to the MySQL command line prompt
sudo mysql
and run the following SQL commands:
use mysql; Alter USER 'root'@'localhost' IDENTIFIED BY 'PASSWORD'; exit
Please annotation that you need to enter the Countersign.
And then try logging into the database without sudo as shown beneath.
mysql -u root -p
How to alter MySQL user countersign in Kali Linux
The method shown above was used to change the authentication types, but it can also exist used to alter the password.
Go to the MySQL command line prompt (use either sudo or the -u option to log in as root):
mysql -u root -p
and run the following commands:
utilise mysql; Alter USER 'root'@'localhost' IDENTIFIED Past 'NEW Password'; leave
Please annotation that you need to enter a NEW PASSWORD.
As well note that this method changes the root user's password. If y'all desire to change the password of another MySQL user, and so in the previous SQL query specify the proper noun of this user, for example:
ALTER USER 'USER'@'localhost' IDENTIFIED By 'NEW PASSWORD';
No password and empty MySQL password
If y'all piece of work exclusively on localhost and you do not intendance about security problems, then for convenience yous tin set an empty password (do non do this if yous do not fully understand the possible risks):
Change USER 'root'@'localhost' IDENTIFIED By '';
In this example, when connecting, yous do not need to use the -p pick:
mysql -u root
How to install phpMyAdmin on Kali Linux
By default phpMyAdmin is non installed on Kali Linux.
Installation tin be done in two ways:
- Since phpMyAdmin is a PHP web application, you can simply download the annal with the source lawmaking (scripts) and unpack it to any binder on the server.
- Nearly distributions have a phpMyAdmin installation package in the standard repositories. The advantage of this approach is that you exercise not need to go along track of new phpMyAdmin releases and do manual updates.
I adopt to install phpMyAdmin from the standard repositories (while WordPress, on the contrary, I prefer to install by simply copying the folder with the WordPress files to the web server binder; thanks to this I command the update process; if you really need to update, then all this is done in the user-friendly spider web interface of WordPress itself).
You lot should already have Apache, MySQL, PHP installed. Past default, they are already bachelor in Kali Linux, just if you take a version with a minimum number of packages, then install them:
sudo apt install apache2 default-mysql-server php
Install phpMyAdmin with the following command:
sudo apt install phpmyadmin
Answer No to the configuration prompt with dbconfig-common:

Use the Tab key to movement between items and Enter to press.
Select "apache2".
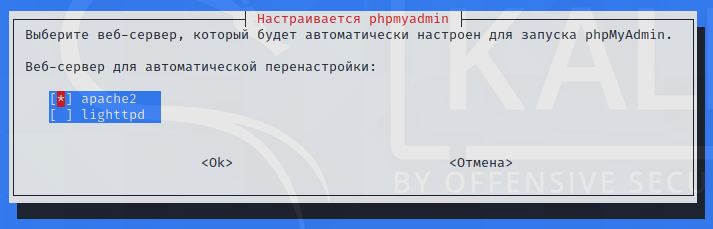
Use the Space key to select items, use the Tab cardinal to move between items, and printing Enter to end.
Now, subsequently enabling the spider web server, phpMyAdmin will be bachelor athttp://your_server_IP/phpmyadmin/
And for a local server at http://localhost/phpmyadmin/
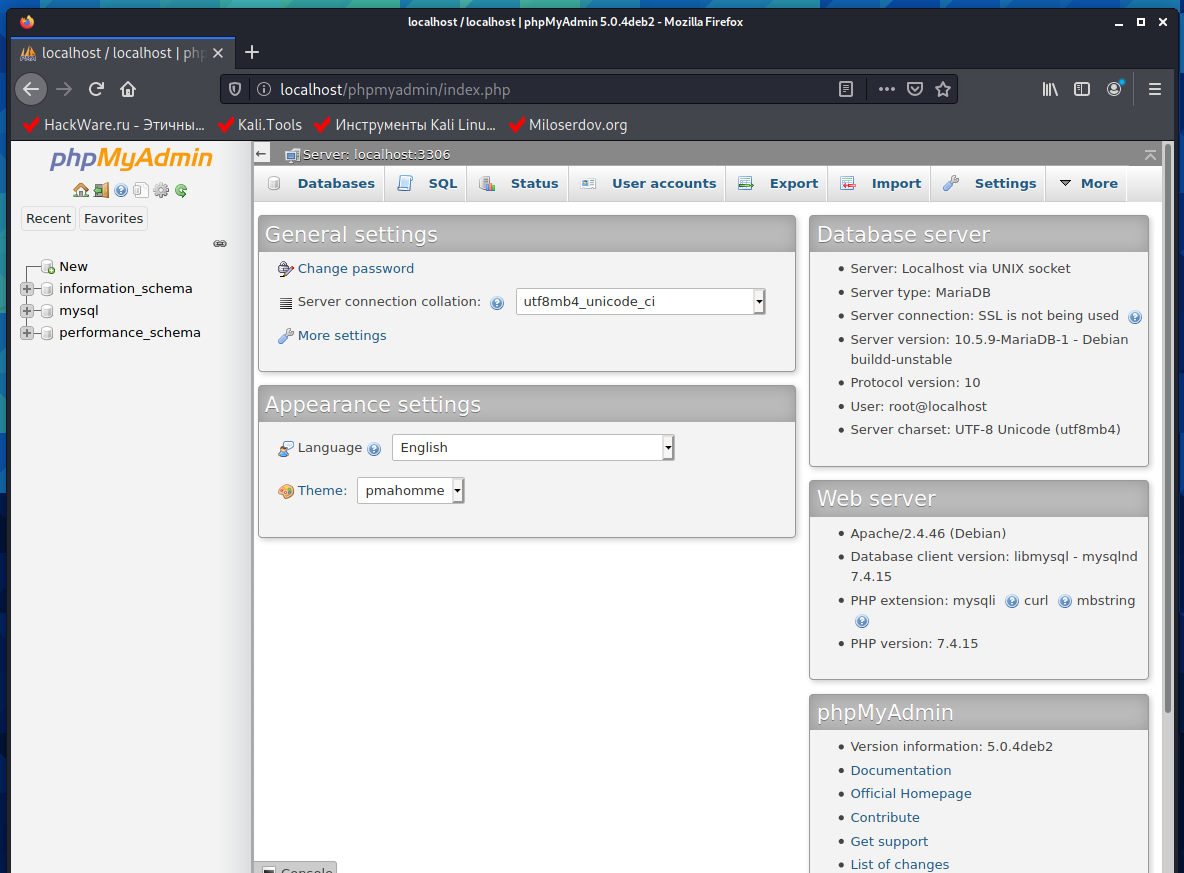
Don't forget to start the services:
sudo systemctl commencement apache2 sudo systemctl start mysql
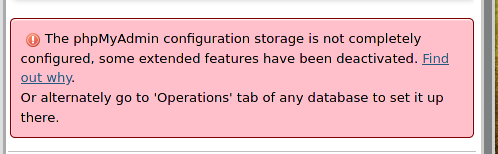
At the bottom of the phpMyAdmin page, you can see the letters with a cherry-red groundwork:
The phpMyAdmin configuration storage is non completely configured, some extended features take been deactivated. Find out why. Or alternately go to 'Operations' tab of any database to set information technology upwardly in that location.
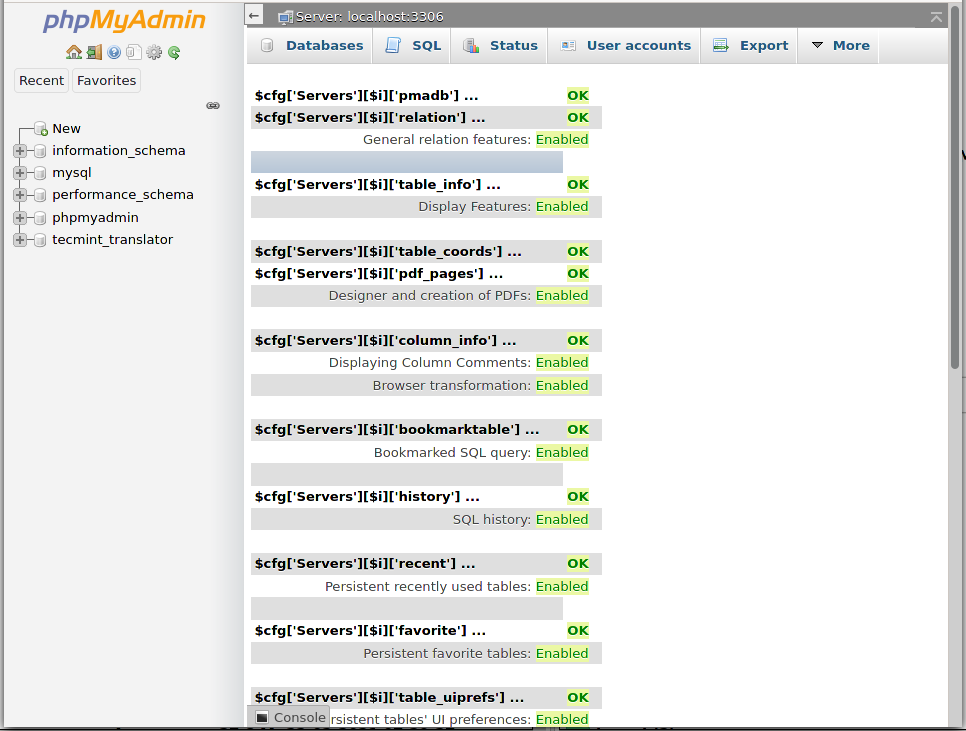
If yous only want to enable them, then follow the link http://localhost/phpmyadmin/chk_rel.php and click "Create Database".
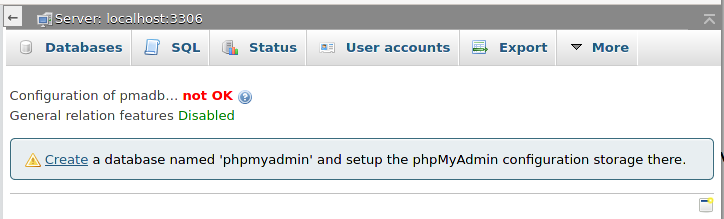
Later that, all new functions will exist activated.
How to change phpMyAdmin URL. How to enable and disable phpMyAdmin
If during the installation of phpMyAdmin y'all chose non to configure it for use with the Apache spider web server, use the command to enable phpMyAdmin:
sudo ln -s /etc/phpmyadmin/apache.conf /etc/apache2/conf-enabled/
Restart the web server for the changes to take effect.
To disable phpMyAdmin apply the command:
sudo rm /etc/apache2/conf-enabled/phpmyadmin.conf
Restart the web server for the changes to take effect.
At that place is an of import line in the /etc/phpmyadmin/apache.conf file:
Alias /phpmyadmin /usr/share/phpmyadmin
Its essence is that the URL /phpmyadmin (for example, http://localhost/phpmyadmin) begins to correspond to the /usr/share/phpmyadmin folder. That is, the phpMyAdmin files (scripts) are physically located in /usr/share/phpmyadmin, and not in the web server directory (for example, /var/world wide web/html/).
Many automatic scanners of "hidden" files and folders of the web server and sites must check the directories "phpmyadmin", "pma" and others like that. You tin can hide your phpMyAdmin nicely by changing the Alias. For instance:
Allonym /lkjgler94345 /usr/share/phpmyadmin
PhpMyAdmin will now be available at http://localhost/lkjgler94345 - not like shooting fish in a barrel to find.
Fault "Login without a password is forbidden by configuration (see AllowNoPassword)"
When you endeavour to log into phpMyAdmin with a blank password, you may receive an error:
Login without a password is forbidden by configuration (meet AllowNoPassword)
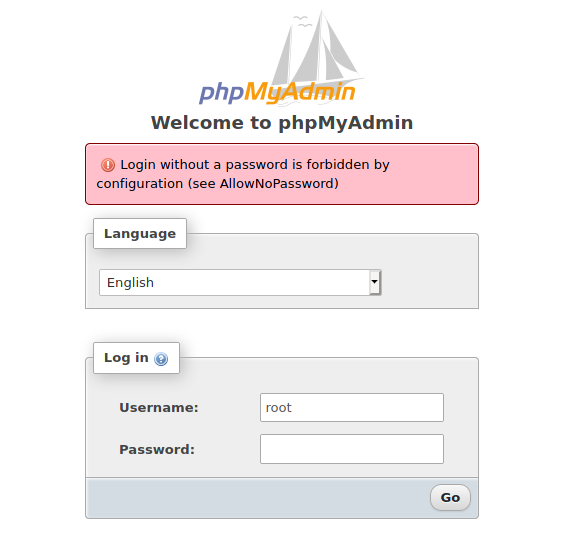
The bottom line is that login equally root or another user without a password is prohibited past the phpMyAdmin configuration.
Two means to set up it:
- set MySQL password
- allow passwordless login in phpMyAdmin config
To enable passwordless login in phpMyAdmin, open the /etc/phpmyadmin/config.inc.php file:
sudo gedit /etc/phpmyadmin/config.inc.php
Find the second (there are two) line:
// $cfg['Servers'][$i]['AllowNoPassword'] = True;
uncomment it to get:
$cfg['Servers'][$i]['AllowNoPassword'] = TRUE;
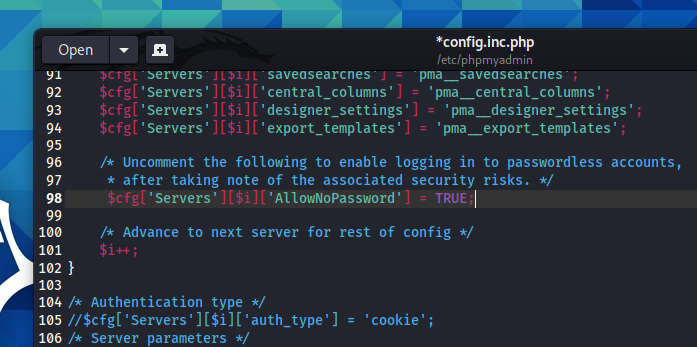
Salvage and close the config.inc.php file.
How to utilise phpMyAdmin on Kali Linux
Working in phpMyAdmin is intuitive, so there shouldn't be any difficulties.
Just by default PHP has very small limits on the size of the processed file, so if you import or consign a large database, y'all may encounter phpMyAdmin's "Incorrect format parameter". The fault occurs due to PHP restrictions on the size of uploaded files and files transferred by the Postal service method.
Information technology is necessary to increase the value of these two variables in the php.ini (to discover it locate php.ini) configuration file. Open the php.ini file and set a larger value for the post-obit variables:
upload_max_filesize=64M post_max_size=64M
By default, the values in that location are:
upload_max_filesize = 2M post_max_size = 8M
Of class, this is likewise little for almost any task.
Restart the web server for the changes to take consequence.
If you piece of work a lot with phpMyAdmin, so you can customize it for yourself, including setting default settings for import and export. An example of how to do this in the article "How to modify default export settings in phpMyAdmin".
phpMyAdmin culling
Annotation that phpMyAdmin is a shim that uses PHP to dispense databases. Therefore, there is a loss in speed when processing very big databases, and you can also encounter the PHP limits ready in its configuration file.
Importing and exporting large databases into MySQL can exist performed using MySQL itself - auxiliary utilities are supplied with the DBMS that let you to perform diverse deportment. To export databases, yous can apply mysqldump utility.
To consign a database, use the following command
mysqldump -u username -p database_name > data-dump.sql
Where:
- username is the username with which you can log into the database
- database_name is the proper noun of the database to consign
- data-dump.sql is a file in the current directory where the output will be saved
Database import
To import an existing database file into MySQL or MariaDB, you demand to create a new database into which the contents of the dump file will exist imported.
Start by logging into the database as root or some other user with sufficient privileges to create a new database.
mysql -u root -p
This will give you a prompt to the MySQL shell. Side by side, create a new database called new_database.
CREATE DATABASE new_database;
A confirmation will exist displayed nearly creation.
Output Query OK, one row affected (0.00 sec)
At present exit the MySQL shell by pressing CTRL+D. On a regular command line, you can import the file with the post-obit command:
mysql -u username -p new_database < data-dump.sql
Where:
- username is the username with which you lot tin can log into the database
- newdatabase is the name of the newly created database
- data-dump.sql - dump file with data for import located in the current directory
Successful execution of the command will not brandish whatsoever messages. If errors occur during this process, mysql volition impress them in the terminal. Yous tin can verify that the database has been imported by logging into the MySQL beat again and analyzing the data. This tin can be done past selecting a new database with the control
USE new_database
and then send a SQL query:
Prove TABLES;
or a similar control to view the data.
How do I backup multiple MySQL databases?
If you want to back up multiple databases, run the following command. The following case will backup the structure and data of the rsyslog, syslog databases into a single file chosen rsyslog_syslog.sql.
mysqldump -u root -p --databases rsyslog syslog > rsyslog_syslog.sql
How do I back up all databases?
If y'all want to back up all databases, then employ the following command with the --all-database option. The following command volition back up all databases, their structure and data, to a file chosen all-databases.sql.
mysqldump -u root -ptecmint --all-databases > all-databases.sql
How to backup just the MySQL database structure?
If you want to brand a fill-in copy of the database structure without information, so use the --no-data selection in the control. The following command will export the rsyslog database structure to the rsyslog_structure.sql file.
mysqldump -u root -p --no-data rsyslog > rsyslog_structure.sql
How to backup only information from MySQL database?
To create a backup of only information from a database without a structure, use the --no-create-info pick with the control. This command will accept information from the rsyslog database and copy it to the rsyslog_data.sql file.
mysqldump -u root -p --no-create-db --no-create-info rsyslog > rsyslog_data.sql
How practise I fill-in one table from a database?
With the next command yous can make a backup copy of 1 tabular array or certain tables from your database. For instance, the following control will only make a backup of the wp_posts tabular array from the wordpress database.
mysqldump -u root -p wordpress wp_posts > wordpress_posts.sql
How practice I fill-in multiple tables?
If yous want to back up several or specific tables from the database, divide each table with a space.
mysqldump -u root -p wordpress wp_posts wp_comments > wordpress_posts_comments.sql
How do I support a remote MySQL database?
The following command volition support the "gallery" database from the remote server 185.117.153.79 to the local server.
mysqldump -h 185.117.153.79 -u root -p gallery > gallery.sql
Y'all can edit databases, add together new records, delete records, etc. from the command line using SQL queries.
Additional MySQL Resources
Yous may also be interested in the post-obit articles:
- Configuring and starting network services on Kali Linux (Apache, MySQL, SSH, PostgreSQL, NetworkManager and Bluetooth)
- Nuts of working with a web server for a pentester
- What is the MySQL root password in Kali Linux. How to change/reset MySQL root password in Kali Linux
- Default passwords in Kali Linux
- Password and unix_socket hallmark in MySQL and MariaDB. Mistake "#1698 - Access denied for user 'root'@'localhost'" (SOLVED)

Source: https://miloserdov.org/?p=5910
Posted by: martinantrader.blogspot.com
0 Response to "How To Install Mysql Server In Kali Linux"
Post a Comment